Oct 31, 2009

Happy Halloween!!!!


It's Halloween YAY!
.....so I thought I'd bring you all a very special TREAT! :)

Take a look at this AWESOME technique by our very own Leslie Ashe! She created an AMAZING LO, that is LOADED with techniques to do and try! I know I will be! :)


Now...I hope you all have a wonderful and SAFE time tonight what ever you are doing on this Halloween night! :)
xo
Loves,
Kimberly

Oct 30, 2009

More Halloween goodies for you...

I'm sure many of you are getting ready for Trick or Treating tomorrow! Unfortunately, we are supposed to get rain for Halloween. We might be trick-or-treating at the mall this year! Here's hoping for a dry day for you.

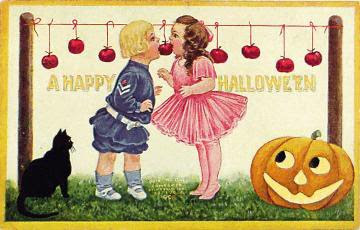
If you need to make some last minute cards, check out these cute vintage postcards:
www.silvercollectblog.com

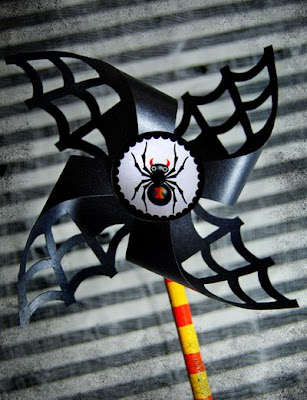
And check out these fun spinners! These would be fun using the die cut web paper that was in one of the add-0n kits this month!
Have a safe and happy Halloween!
Danielle

Oct 29, 2009

Lollipop bouquet...

It's not too late to create a quick and easy Halloween gift for those special people in your life! How about a Lollipop Bouquet? I made this one with Dream Street's new Superstition line of chipboard, papers and rub ons.I found a box at the craft store and covered with paper, added chipboard around the top of the box and a "trick or treat" rub on. Next, I inserted some floral foam down into the box (you can glue it in with a hot glue gun) and covered the top with some webbing. Lastly, I poked the lollipops into the foam. You can add little signs as I did here by adhering little chipboard sayings to bamboo skewers.
To create the lollipop creatures:
1. Spider - Cut a circle from the patterned paper about 2 1/2 inches around. Distress edges. Punch 2 small circles in the lower body of the spider to slide lollipop through. Add chipboard photo corners for legs with glue dots adhered to the back of the body. Lastly, punch hole in the chipboard tag and tie it onto the lollipop with a bit of twine.
2. Ghost - Cut a ghost shape from patterned paper. Punch 2 small circles from black paper for the eyes. Punch 2 small holes near bottom of ghost to insert the lollipop stick. Cut "beware" strip from patterned paper and attach to bottom of ghost. Add chipboard piece to ghost.
You can just poke these little guys into the foam and they are a cute addition. Or you can make the lollipop creatures just how they are to hand out to the children at school!
Danielle

Oct 27, 2009

Create your own ribbon flowers...

I've recently discovered how to create ribbon flowers, and can't stop making them now! I want to attach them to everything...pages, cards, sweaters....you name it!
Let me show you how:
1. Cut any width of ribbon about 12" long or so. The ribbon I used is 1 and 1/2" wide.
2. Thread a needle with embroidery floss. You can use any color of floss, because it will not show.
3. Run needle up and down all the way along the length of the ribbon about 1/2" from the edge. Leave a tail of floss at each end.4. Pull the floss and gather the ribbon up into a circle.5. Overlap ends of ribbon. Tie ends of floss in a knot very tightly. Trim extra floss away.
6. Add a button to the center, if you wish. I use glue dots to adhere the button to the flower. You can also sew them on if you wish.

Here is the finished page:I attached the flower to the large tag and journaled underneath.
Hope you enjoyed this little tutorial. Have a great day,
Danielle

Oct 23, 2009

Picture This

So often you find yourself using the same picture on a layout. Or well okay I do ha ha. I tend to do that because I love to edit my pictures and or playing around with different softwares I have such as Photoshop Elements 7, Adobe Lightroom 2 and CS3. I try and also find quicker ways to play with photo's when I have no time.


One website I love love to use alot especially when I am designing my blog, playing with photos and just need a quick watermark is Picnik. I love Picnik. Honestly I use to use Big Huge Labs for all my mosaic tile pics but now I go to Picnik for everything. You can also use Picasa 3.

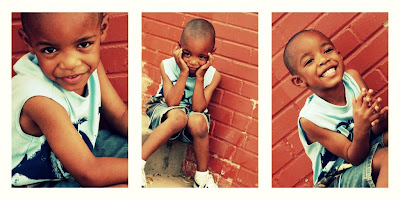
Here is an example of a mosaic photo of Elijah using Picnik the washes I used were Cross Process and 1960's option (fading the tint in and out as I wanted):

Now below I took some of the same pictures and used the duo-tone option in Picnik to play with the colors depending on what papers I wanted to use and or what I plan on doing with the layout especially when using sketches.


So remember there is so much you can do with photos and layouts. Especially if you do not own some of the pricier photo editing softwares . . go and use the free ones. Now I will say this yes Picnik is free but you can use ALL the options for a small fee for the entires year under $30.

Happy Editing.
Sasha Holloway
Tulip Girl

Oct 20, 2009

See and Scrap ...

What draws you in to a layout?

Is it the scrapbooker themselves?

The style that they use to do their pages?

I often find myself drawn to the style and or just overall scheme of it all .. there are so many talented ladies out there in my opinion that you have no time to follow a name. I honestly look at the layout, I gasp and shake my head in amazement and then I look to see who this diva is that has completely left me speechless .. of course I am a fan of many .. but I am open minded to the fact that everyone has a different interpretation of expression using paper and glue dots.

Take this month's kit for example:

we all received the same kit .. but what amazes me is how we all had a different take on the same paper .. and each produced great layouts that are still inspiring and incredible. The team is so diverse that each style expressed a different vision but left you feeling and or having the same emotion.
So what is your take on a layout? Do you feel revived and refreshed when you receive that new kit in the mail and you just take in a deep breathe and start creating .. or do you get nervous and take a step back before you indulge in the goodness .. how often do you find yourself saying .. dang I wish I could scrap like her?

Once you realize you can and stay true to who you are .. you will find and keep the fun in creating and still feel good about what you did .. no matter how many papers you can fit on one layout.

Just remember no matter what you think .. have fun creating for YOU!

Later this week I will discuss bringing life to pictures .. until then I am on quarters for 2 days with the flu.

xoxo
Sasha Holloway
Tulip Girl

Oct 17, 2009

Card Festival...

Hey all,
I hope you are enjoying your weekend! I just wanted to stop in and mention that there is an add-on kit available with the main kit called Card Festival. For those of you who are not into cards, don't worry, it's not JUST a card kit. This is a 12 x 12 add-on kit that goes with the main kit that you can use for pages ~ but as a bonus when you purchase this kit ~ you will receive free directions and patterns for 4 cards made by me. Included are extra tips, ideas, and title/sentiment ideas as well! Let me share some of the cards and ideas with you...

Included are some cute felt flowers and new KI Memories chipboard! Here I cut the flowers into a point to create hearts and turned the little arrow die cut edges into houses.
On the "Special to Me card", I wanted to use all of these patterns, since they were so adorable. I decided to use the blank spot for the rest of the sentiment...
On this card, I will explain how to use your computer to print a sentiment very easily onto a scrap of patterned paper...
And last, but not least a little shaped card! The pattern will be included along with a ton of other fall sentiments that you can use on this card and tips for machine stitching...
Hurry and grab one today HERE before they are gone!
Danielle

Oct 16, 2009

Gallery Favorites: October


What an amazing reveal! I wanted to pick some favorites of mine to share with you! If you'd like to pick some favorites too, I'd love to hear about them!

From Sasha's Gallery:

Sasha is an amazing scrapper. And she certainly has a huge fan in me. I loved everything in her gallery, but this one has to be my fave! That cluster of embellishments and circles is just too awesome!

From Leslie's Gallery:


Lovely Leslie. How much do I love the bow she tied around her layout?! So much! Great design! Great execution! Just awesome!

From Lain's Gallery:

The title is genius. I love the way the uneven letters echo the sentiment of the layout, plus it's a clever way to get a long title on a page. So cool!

From Kimberly's Gallery:


This layout makes me feel so calm and serene. I adore the stitched ribbon frame. And the way she cut up those clouds and used them...wow! This is one of those utterly perfect layouts. I especially love the brads drifting through the sky in the upper right corner!

From my (Julie's) Gallery:
I think this is my favorite layout just because I managed to turn a problem into a solution. I really, really wanted to type my journaling. But my typewriter won't take anything wider than 8.5 inches. So, I cut out the center of the paper and cut it down so it would fit in the typewriter. I added a piece of red cardstock behind it, before I reinserted it in the center!

From Dedra's Gallery:

Um...have you seen that handmade flower? Seriously! It's AMAZING! And her handwriting is some of the coolest I've ever seen! I love it! Plus, who doesn't love a vertical title?! I do!!!

From Danielle's Gallery:

This card blew me out of the water. I mean, I know that Danielle is a master cardmaker, but wowza! Those puffy hearts are cut from flowers!!!! That is the coolest thing ever! By the way, don't forget that you can buy the card kit and get Danielle's instructions for free! What a deal!

From Charity's Gallery:

Charity is one of the most innovative and clever scrappers around. I'm always impressed with her cool projects and this one is no exception. These lunch bags just made me swoon! They are too too cute! I want someone to pack my lunch in one of them!

From Amy's Gallery:

I'm a sucker for spray ink. LOVE that bold yellow splash of color! And the clever bowling ball in the title just made me smile!

I love the bright colors and bold patterns from this kit! All the layouts are so amazing! Be sure to choose your favorites too!

Oct 13, 2009

Sneak-a-Palooza


Oh, baby, have the Tulip Girls been busy! The October kit reveal is almost here and have I got sneak peeks for you!

From Danielle:


From Charity:


From me (Julie):


From Kimberly:


Only one more day left until the big reveal! I can't wait to share!