 Hey there and happy Tuesday!
In honor of Label Tulip's birthday celebration I thought it would be fun to do a little something using a scrapbooking staple of mine, labels! (Also hello, we are called LABEL Tulip. It was too good to pass up.)
Personally, I love labels. There are so many things that you can do with them. You can use them as labels for things (of course) but also as page accents, as frames, as decorative elements... the list goes on. My favorite thing to use them for is journaling.
These days a lot of people are looking for ways to really stretch their scrapbooking dollars, and a good way to do that is to make your own embellishments.
Today's label-theme will be presented to you in two separate posts. In the following post there will be a digital freebie for you (designed by me exclusively for Label Tulip) and a challenge with a prize!!!
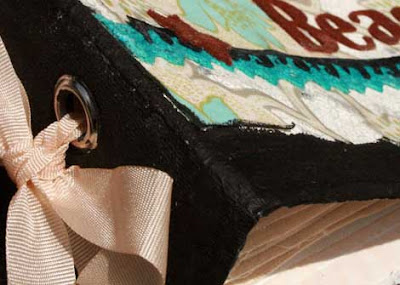
In this tutorial, we are going to be making our own labels out of canvas--for certain reasons which have a little something to do with this TOURIST related item:
 Ahem. I do love me some sneak peeks. ;) Moving on... Let's get the party started and get painty!
To begin, you are going to need the following items:
- Canvas (or a cotton fabric might work)
- Gesso (or white paint or elmer's glue + water)
- Colored paint or a heavily pigmented ink pad
- Label stamps
- Scissors
Optional goodies
- Good journaling pen or sharpie
- Thread or sewing machine
- Eyelet and eyelet setter
- Ribbon
- Other decorative stamps, paint or watercolor
First you need to make sure your canvas (or fabric) is suitably primed and ready to work with.
 I usually buy my canvas fabric from my local art supply store. The texture is a little rough, so I ususally do one or two coats of gesso to prime the surface. This coat ensures that my work surface will be very even and it will also stiffen the fabric which will make it easier to work with later on. Here I cut out a swatch that an easy size to work with (about six inches by eight inches).
If you don't have easy access to buy bulk canvas fabric, the new Claudine Hellmuth canvas sheets are a great alternative, as they have a very fine texture and already start out with a bit of a primed surface. If you are using those, you should just be able to do a light wash of gesso (or paint or glue+water mix) to seal and smooth the surface of your canvas.
While you let everything dry completely, you should determine whate type of label you are going to make. You can obtain some very fine label stamps in the boutique here at Label Tulip, as well as other places. One of my very favorite sets is by 7 Gypsies. Catslife Press also makes several label stamps that I adore.
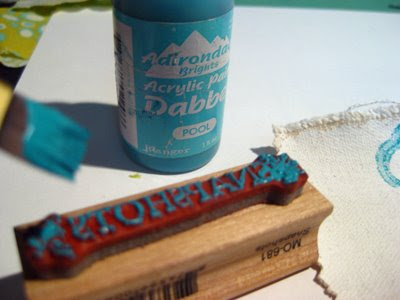
 Once you have chosen a stamp, you'll need to "ink it" with your paint. I prefer paint daubers for this, although you can also use a paintbrush to apply the paint onto the label stamp. Regardless of the tool you use, the best way to get the paint on the label is to gently "tap" it onto the stamp.

 Once your stamp has a good coat of paint or ink, go ahead and stamp onto your canvas. Be sure to apply even pressure across the stamp to ensure good coverage of the image.
 Depending on how your stamp likes the paint and how you applied it, your first label may not look very pretty. This is okay, and can be fixed later (promise). Hopefully though, it looks something like this:

Keep stamping till you have as many labels of this kind as you would like.


You could even stamp journaling using an alphabet stamp or make text strips (think like your own canvas wordfetti):

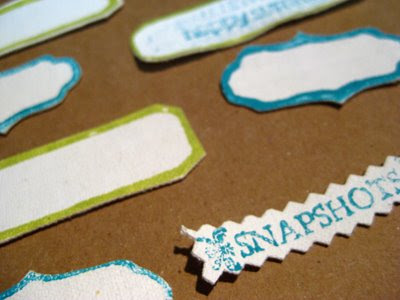
 Once dry, go ahead and cut everything out. Made a mistake? Cut it out or repaint it the edges once you've trimmed out the bad stuff. You should end up with some of these:


 Once dry, go ahead and cut everything out. Made a mistake? Cut it out or repaint it the edges once you've trimmed out the bad stuff. You should end up with some of these:
You can adhere them to your projects by glueing them down or with good old-fashioned sewing.
It's also a quick step to go from label to tag. Grab one of your labels, and your eyelet setter.

Punch a hole, set an eylet, add a little ribbon and voila! Custom and cheap labels and tags.
 Hope you enjoyed this little tutorial. Stay tuned for part two!


12 comments:
I really like this idea! Thanks for the tutorial!
Great ideas! I'm printing this off to try this weekend. Thanks!
very cool!! love all the pictures to show how it's done
Amazing amount of thought put into this Christina, thanks! And what a great idea...just a little canvas, a little gesso, and I've got my OWN labels. This is great for small biz owners -- they could make their own labels for their Etsy items or something. Love it!
WHAT A WONDERFUL IDEA!! I LOVE IT!
fun tutorial! thanx for sharing!!
Thanx for the tutorial. I am starting to get the canvas bug! I am itching to start playing with canvas myself and see what I can do with it. Thanx for the tips.
Im in instant need of canvas! :-D
very cool! must do this!
great idea..loving the way this looks..thanks for showing!!
Awesome idea for canvas labels and tags! Love this... tfs!
Fabulous...thanks for the tutorial!! Love love this idea....who knew you could make canvas tags so easily! You rock xOxO
Post a Comment